Sending IPAWS Alerts: Essential Guidelines
This article describes using the Integrated Public Alert and Warning System to send alerts to the public.
What You Need
- NO installation or download required.
- Computer or mobile device with internet connection and credentials is required.
Login
- Open an internet browser and type in the login address in the URL line:
(https://cap.alertsense.com) - Enter credentials and click Log In.
Tip: To access IPAWS from the main login screen in the main interface instead, click Send IPAWS Alert.
Starting the Alerting Process
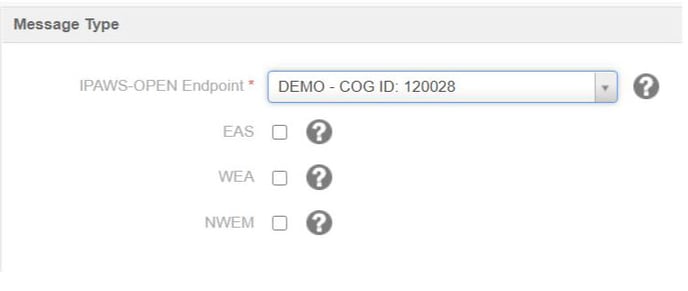
- Click Send a Public Message.

- Select the correct IPAWS-Open Endpoint.
Warning:
Be careful when selecting the IPAWS-Open Endpoint.
- LIVE is for a real alert delivered to the public.
- DEMO is for a test alert that goes to the IPAWS Lab.
Once you have chosen the IPAWS-OPEN Endpoint, choose the channels where you wish to distribute your message.
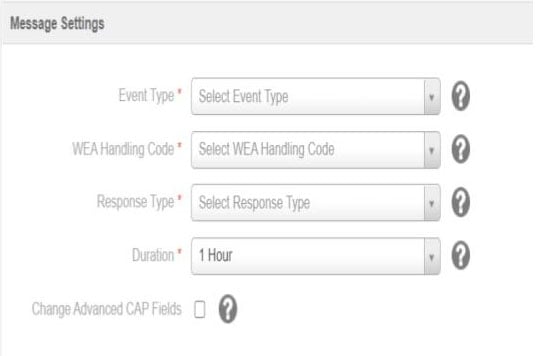
Message Settings Section
- In Event Type, choose the correct Event Code.
- If WEA is selected, the Handling Code will automatically populate based on the Event Code selected.
- Select a Duration.
- This is how long you expect your event to last.
- Our suggestion if unknown is to set it for 4 hours.
- If sending a message to other COGS, click the checkbox next to Change Advanced CAP Fields.
- This is not common and is considered an advanced feature.
- In the Send to Other COGS field, select the recipient COGS’ address by searching for the FIPS Code or the name of the agency.
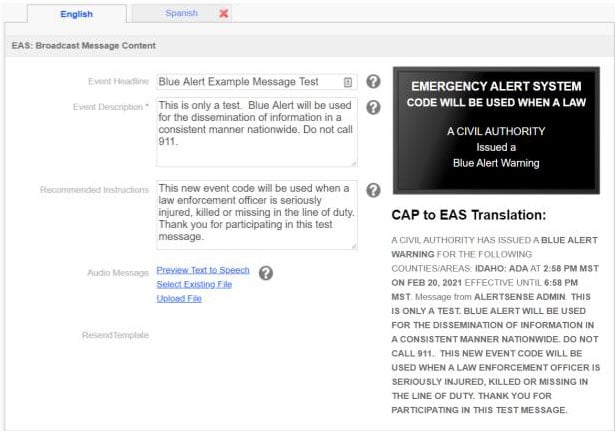
EAS Message Content
- In the Event Headline field, write a summary of the emergency.
- This is not sent to the public.
- In the Event Description field, add a specific description.
- Include:
- Who is declaring the warning
- What’s happening
- The affected region
- Include:
- In the Recommended Instructions field, list instructions to the public.
- If desired, Spanish can be added to your alert. This is not auto translated, so Spanish text must be entered.
- Preview Text to Speech or Upload a Pre-recorded audio file: Preview the text to speech by clicking "Preview Text to Speech." In this box you can click "Preview TTS Audio" to hear what the message will sound like. In this box, you can make phonetic changes. If changes are made, click "Save Audio." This will convert any changes to the audio file to an mp3 file. Optionally, you can upload your own audio file in mp3 format. There is no in-browser voice recording for IPAWS.

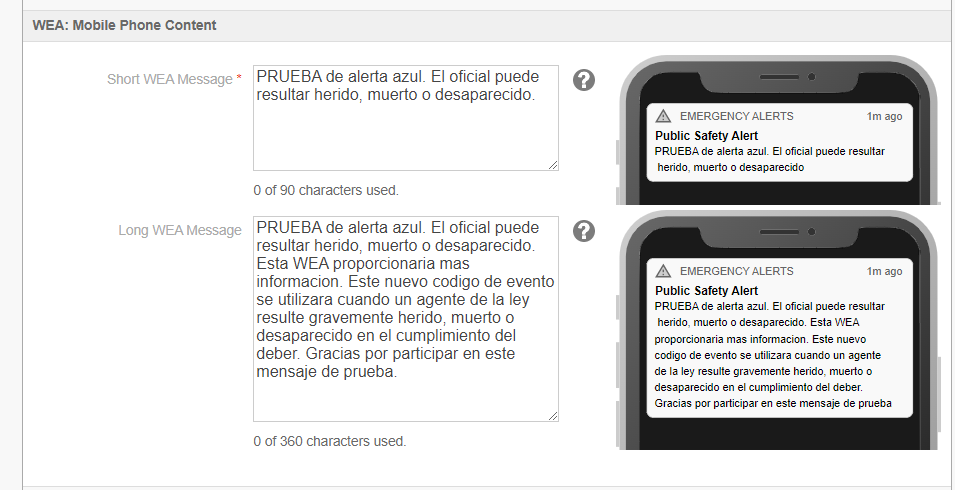
WEA Message Content
- In the Short WEA Message field (required), write a summary of the emergency in 90 characters or less.
- In the Long WEA Message field (optional), add a longer message with more description like who is declaring the warning, what’s happening, and the affected region.
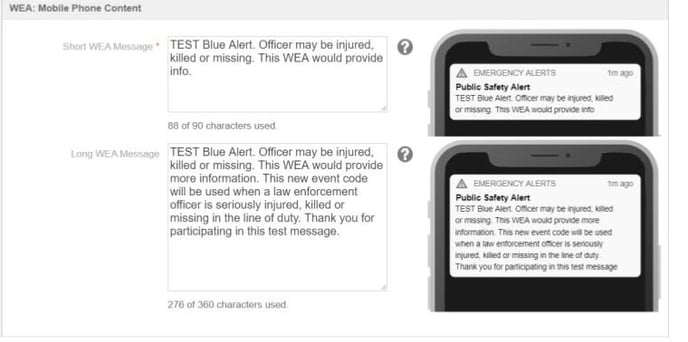
WEA Map Selection Tool
Note: This step is only necessary if you are sending a WEA Alert.
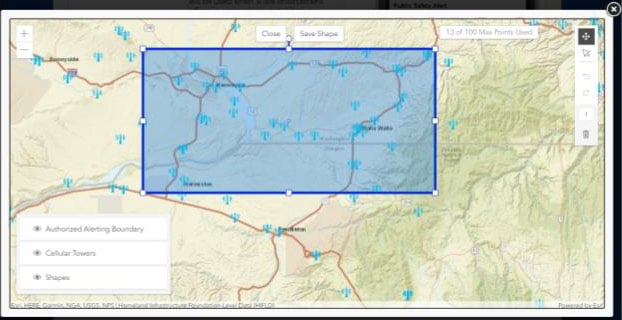
- Enter Area Description, Geographic Area, and FIPS Code to designate an area to receive your message.

- Click Add Shape to open the map selection tool.
- Draw a polygon or circle to select an area that will receive your alert.
- Click Save Shape to finish selecting the area.
Send Alert
- Once the alert form is completed, we suggest saving the alert as a template to use again if needed. To do this, simply scroll to the top of the screen and click Save Template.
- To confirm saving, you can then create a group or just name your template.
- Click Send Alert to send your alert. Prior to sending the message, you will always want to review the entire alert before submitting.

- Type in the correct word – Test or Live to confirm your message
- Click Yes, Send (Live or Test) Alert.
- Once the Alert is sent, a summary screen will show the successful completion of your message.
- For more info, check Alert History under Reports for the status.
- Use Update, Resend, or Cancel as needed.
Other Details:
If Spanish language needs to be included with your message, simply click "Spanish" tab. Spanish can be included for EAS and WEA.
Auto-translate is not an option, so you will need to paste in the Spanish language that you want to have communicated. Our recommendation is to have some canned native language text ready for important scenarios like fire, flood or other identified hazards and vulnerabilities in your area.
As an example for EAS, Spanish broadcast stations can transmit this without delay. Uploading a pre-recorded audio file is recommended for Spanish. If you also uploaded a pre-recorded file for English, the broadcast station will be able to use the correct file for transmission based on their Endec settings.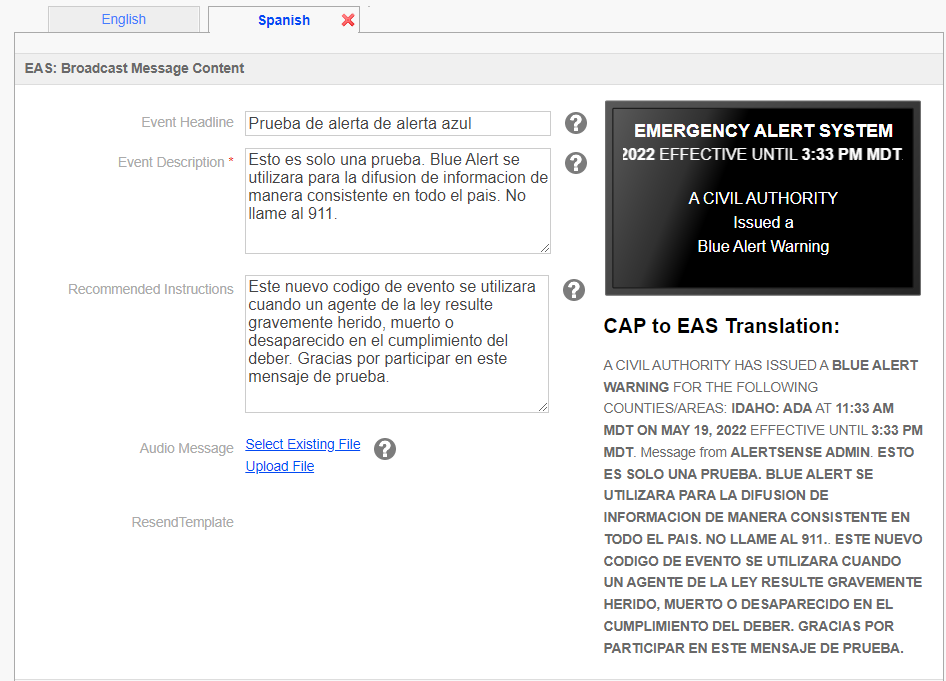
For WEA, if your recipient has their phone set with the primary language as Spanish, they will receive the Spanish message.
