
Create a Template
Complete the Template Settings Field
- Select Alerting/Poll Templates from the navigation pane.
- From the Templates section, click the blue plus button
.png?width=29&name=2021-08-04%20(2).png) .
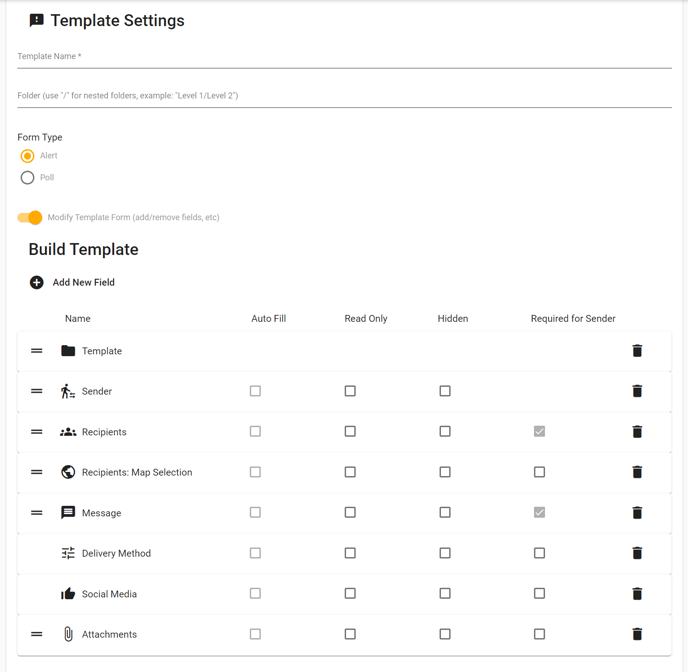
. - From the Template Settings section, you can give your template a name, assign it to a folder, and select your template type (alert or poll).
- To give your template a name, type a name in the Template Name field.
- Assign your template to a Folder by typing a folder's name or selecting a template's name from the drop-down list in the Folder field.
- To place your template within a nested folder (a folder that is sorted beneath another folder), add a back slash / behind the original folder's name.
.png?width=688&name=Screenshot%20(78).png)
- Toggle "Modify Template Form" to on to add or remove fields from the template.
- Select Add New Field
.png?width=85&name=Template%20Settings%20Section%20Screenshot%20(2).png) to add a field to the template.
to add a field to the template. - Select the Delete button
 next to the field's name if you want to delete a field from the template.
 - Select and drag the icon
.png?width=29&name=Template%20Settings%20Section%20Screenshot%20(3).png) next to a section's name to rearrange a template section on the form.
next to a section's name to rearrange a template section on the form.
- Select Add New Field
Complete the Alert Sender Information Section
- From the Alert Sender Information section, you can assign a Brand to your template, give your template a specific Sender Display Name, or give your template a specific Reply-To Email Address.
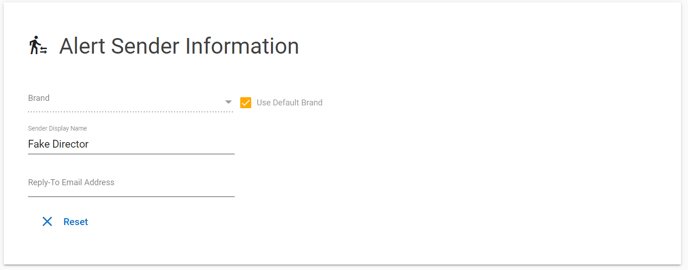
To learn more about how to use Message Branding, Read this article.
Select Recipients
You have two options for designating recipients within a template: the Recipients card and Map Selection.
Recipients Card
- To select recipients from the Recipients Card, select the icon next to Groups
 or Users
  .
. - Select a contact from the drop-down list.
- If you don't immediately see a contact in the drop-down list, you can use the search field to search for specific contacts.
.png?width=688&name=Screenshot%20(64).png)
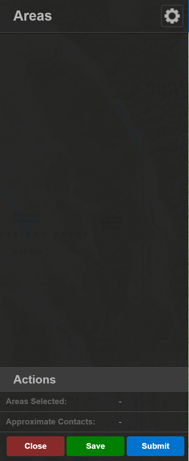
Map Selection
- From the Recipients: Map Selection section, select Add New Area
 .
. - Select the Polygon Drawing Tools Icon
.png?width=32&name=Map_Templates%20(2).png) .
.
- Use the Select Layer drop-down menu to select the recipient type (i.e., Internal User, MyAlerts App User, etc.) that you want to include in your selection.
- Use the Draw drop-down menu to choose your area's shape.
- Name your area, and use your cursor to draw an area on your map.
- Open the Areas Panel
.png?width=44&name=Map_Templates%20(3).png) .
. - Select Submit to submit users to the template as recipients.
Complete the Message Section
1. Fill out the message's Subject and Body.
.png?width=688&name=Screenshot%20(70).png)
2. Select your message's delivery channels under Delivery Method.
.png?width=688&name=Screenshot%20(72).png)
If your tenant has default delivery channels, you can toggle "Use Default Delivery Methods" to On to deliver via the default channels.
3. Under Message Customization, customize the message if you want the message to appear different when it's sent via different delivery channels.
.png?width=688&name=Screenshot%20(74).png)
Save or Update Your Template
- From the Review section, review your template's name and type.
- Click Save
-1.png?width=53&name=2021-08-24%20(5)-1.png) to save a new template.
to save a new template. - To save edits made to a pre-existing template, click Update
.png?width=59&name=Screenshot%20(40).png) .
.
Fill Out an Alert Form with a Template
- From the navigation menu, navigate to Send Alert or Send Poll.
- From the Alert/Poll Templates section, click Select Template
.png?width=112&name=Screenshot%20(76).png) .
. - Select the template you want to use in your alert.
.png?width=688&name=Screenshot%20(77).png)