
Import Options
Shapefile Limitations and Additional Information
ESRI shapefile information and limitations.
Konexus shapefile information and limitations.
FEMA – Distribution Pathways and Alert Coverage
Import from a File
Use the steps below to import your shapes from the following file types:
- Esri Shapefile (.zip)
- CSV
- GeoJson
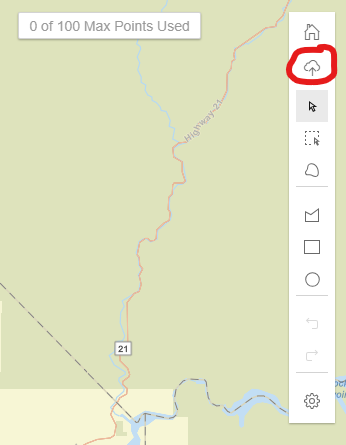
- Click the Import Shape button at the top of toolbar on the right-hand side of the map.

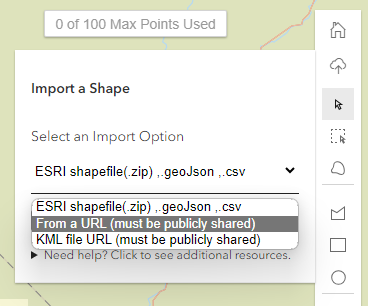
- The default import type selection is file import, you can leave this option as is.
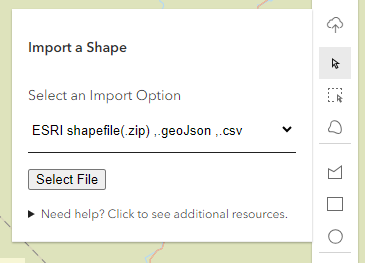
- Click the Select File button and select your file from your computer when prompted.
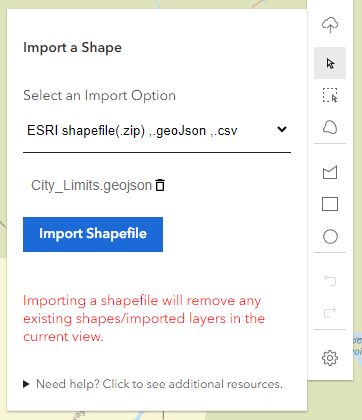
- After selecting your file, click the Import Shapefile button to start the import process.
- After the file has been successfully imported, it will be displayed on the map.
- Click on any of the imported layers to view the details of the selected layer.
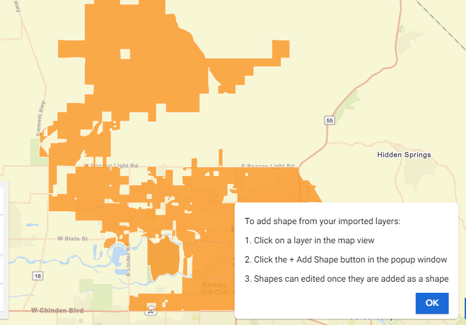
- Within the details popup, click the + Add Shape button to add the shape to the map.
- The add shape button may appear on the top or bottom of the dialog, depending on where you click on the map.
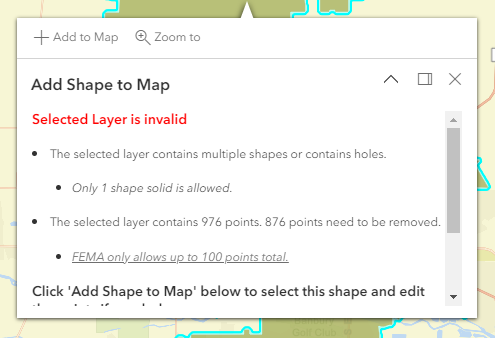
- The dialog will show you the full details of the selected layer.
- Invalid layers can still be added as a shape to the map, but must be made valid by editing the added shape before the shape can be saved back to the IPAWS message form.
- See the article on Editing Shapes for more information.
- Once you have added the shape to the map, you can edit it as needed.
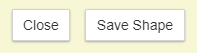
- When you are done editing your shape, and the shape is valid, click Save Shape to return to the IPAWS message form.
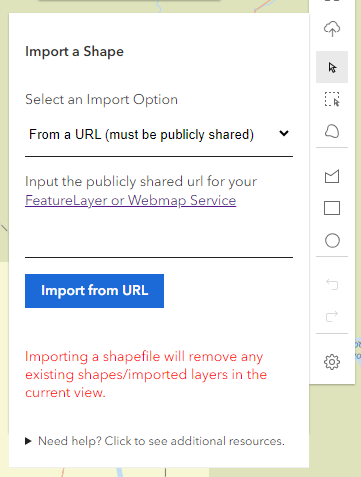
Import from a URL
Only publicly available URLs can be used to import layers and shapes.
- Click the Import Shape button at the top of toolbar on the right-hand side of the map.
- Select the From URL option from the import type dropdown menu.
- Enter the URL of your hosted FeatureLayer or Webmap Service in the provided field, then click Import from URL.
- After the url has been successfully imported, it will be displayed on the map.
- Click on any of the imported layers to view the details of the selected layer.
- Within the details popup, click the + Add Shape button to add the shape to the map.

- The add shape button may appear on the top or bottom of the dialog, depending on where you click on the map.
- The dialog will show you the full details of the selected layer.
- Invalid layers can still be added as a shape to the map, but must be made valid by editing the added shape before the shape can be saved back to the IPAWS message form.
- See the article on Editing Shapes for more information.
- Once you have added the shape to the map, you can edit it as needed.
- When you are done editing your shape, and the shape is valid, click Save Shape to return to the IPAWS message form.
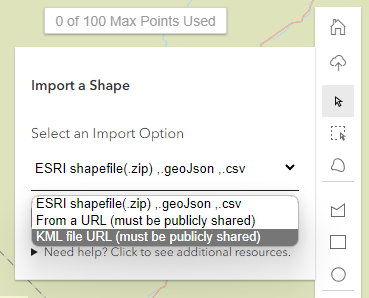
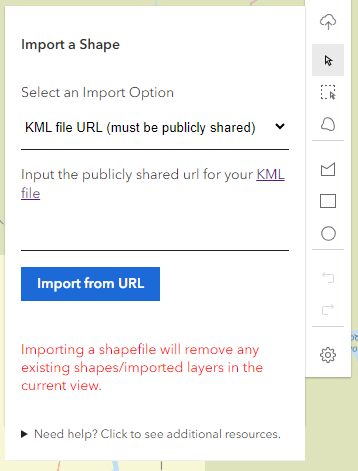
Import a KML File
KML files can only be imported from a publicly available URL. Local file imports for KML files are not supported at this time.
- Click the Import Shape button at the top of toolbar on the right-hand side of the map.
- Select the KML File URL option from the import type dropdown menu.
- Enter the URL of your hosted FeatureLayer or Webmap Service in the provided field, then click Import from URL.
- After the url has been successfully imported, it will be displayed on the map.
- Click on any of the imported layers to view the details of the selected layer.
- Within the details popup, click the + Add Shape button to add the shape to the map.

- The add shape button may appear on the top or bottom of the dialog, depending on where you click on the map.
- The dialog will show you the full details of the selected layer.
- Invalid layers can still be added as a shape to the map, but must be made valid by editing the added shape before the shape can be saved back to the IPAWS message form.
- See the article on Editing Shapes for more information.
- Once you have added the shape to the map, you can edit it as needed.
- When you are done editing your shape, and the shape is valid, click Save Shape to return to the IPAWS message form.