
NOTE: Per FCC regulations, ETN (Emergency Telephone Notification) phone numbers are not allowed to be called unless it is an EMERGENCY. These numbers did not opt-in to receive alerts, so not adhering to this guideline can have severe consequences for your agency! This must be acknowledged before sending any alert with ETN.
Create Alert
-
Select Send Alert from the left-hand navigation menu.

- The additional menu on the left-hand side of the Send Alert page outlines the Send Alert Form that is assigned to your role. As you complete the alert form, the selected values will populate here as a reference as you continue through the create alert process.

- The additional menu on the left-hand side of the Send Alert page outlines the Send Alert Form that is assigned to your role. As you complete the alert form, the selected values will populate here as a reference as you continue through the create alert process.
-
To begin your alert, select an alert or poll template from the Alert/Poll Templates section, or complete the alert form's sections manually.
-
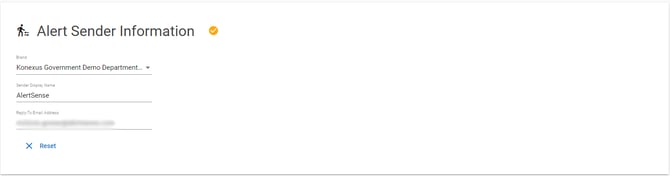
If necessary, update the fields in the Alert Sender information section.
-
Brand- The brand that will be associated with your alert. This impacts your alert's appearance and might impact the other fields in the Alert Sender information section. Click here to learn more about creating custom brands.
-
Sender Display Name- The sender's name that will be associated with the alert.
-
Reply-To Email Address- The reply-to address that will appear in the email sent to recipients (if email is selected as a delivery channel).
-
Please note, the Brand dropdown list may not appear for all customers because Message Branding is a Pro Plan feature.
Select Internal Recipients
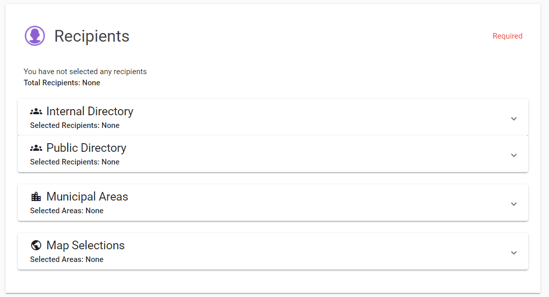
- If you wish to alert internal recipients, you can select these recipients from the Recipients card. Make sure to choose the Internal Directory options for Internal recipients. Public Directory, Municipal Areas and Map Selections are for Public recipients.
- Some users may have auto-populated recipients based on their role. If this is the case, the recipient group will auto-populate on this card.
- Users can add to the pre-populated groups if desired.
- Pre-populated groups cannot be removed.
- Some users may have auto-populated recipients based on their role. If this is the case, the recipient group will auto-populate on this card.
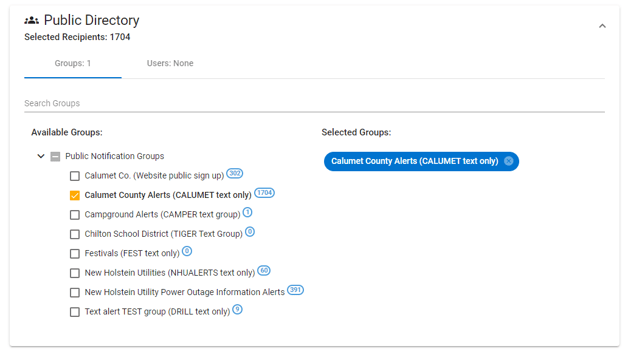
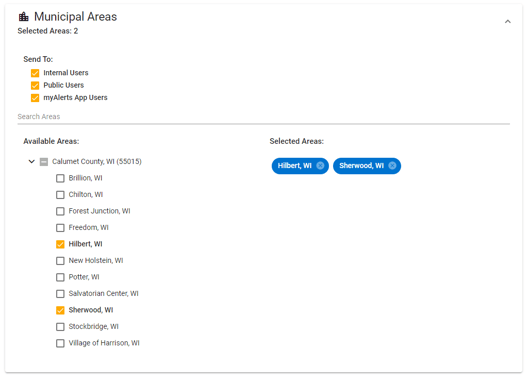
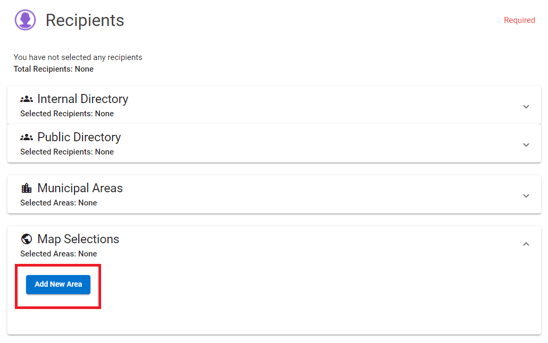
Select Public Recipients via Geo-Location Alerting, Municipal Areas or Public Groups
- To select recipients by Public Group or Municipal Area, choose Public Directory and/or Municipal Areas. Select the group(s) or area(s) you wish to send notifications.
- Make your selections:
- To add a geo-targeted area, scroll to the Recipients: Map Selections section.
- Click Add New Area.
Select Recipients with the Mapping Tool
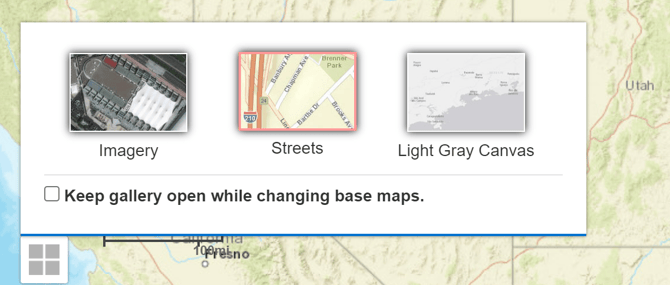
- Use the Base Maps Gallery icon
 in the bottom-left corner to choose how your map area will appear:
- Imagery: A view similar to Google Earth.
- Streets: A view with streets and highways delineated.
- Light Gray Canvas: A simplistic view with basic symbols for rivers and notations for cities.
- To view a specific area on the map, you can search for an address or scroll to find the location you need.
- To search for a specific area you want to alert, type the area's name into the Mapping Tool's search bar.
- Select the area from the search's results.
- To select an area for alerting, select the Drawing Tools icon
.png?width=28&name=Map_Templates%20(2).png) and select a shape for your area.
and select a shape for your area. - Name your area.
- Please note, you can use the default name generated for the shape if you will only have one shape on the map. If you will have multiple shapes, give the shape a specific name.
- Once you have named your shape, you can draw the area. Simply click down with you four-point cursor and drag to draw a shape. Release your mouse to complete the shape.
- The Areas panel will expand with details about your selected area.
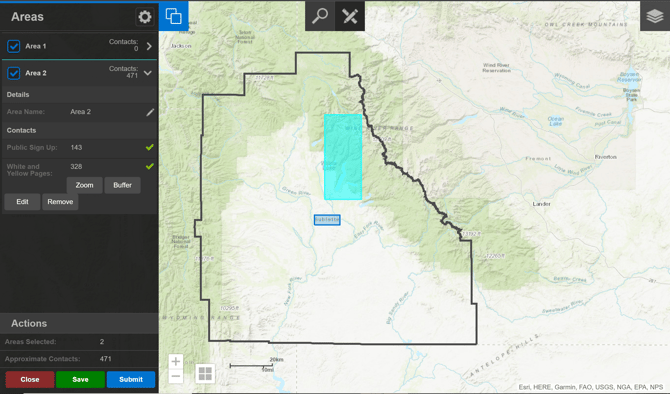
Edit Your Shape
- Once you have completed your shape, the Areas panel will appear on the left side of your screen.
- From the Areas panel, you can select Edit to edit your shape.
- Drag the shape's edges to change the area.
- Don't forget to click Save to save any edits to your shape.
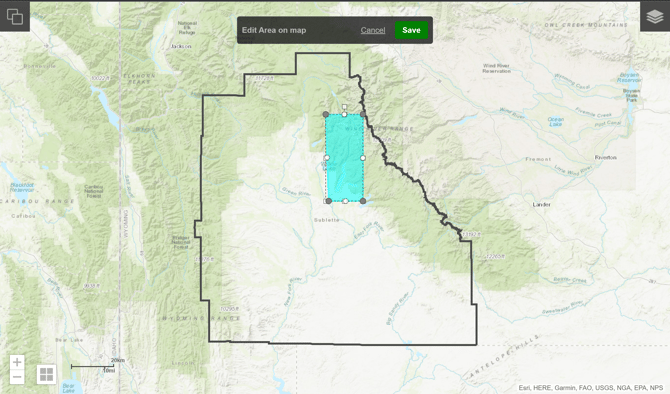
- Don't forget to click Save to save any edits to your shape.
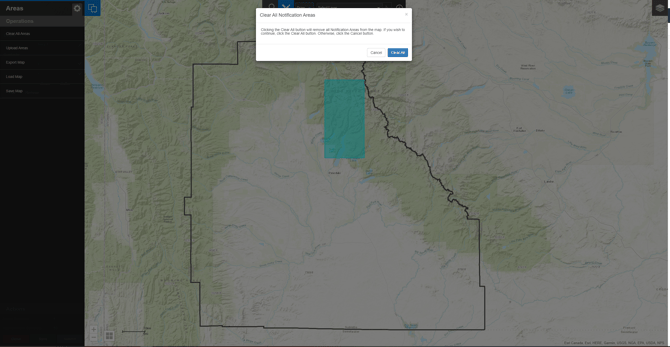
- To clear areas from the map, select the gear icon, then select Clear All Areas.
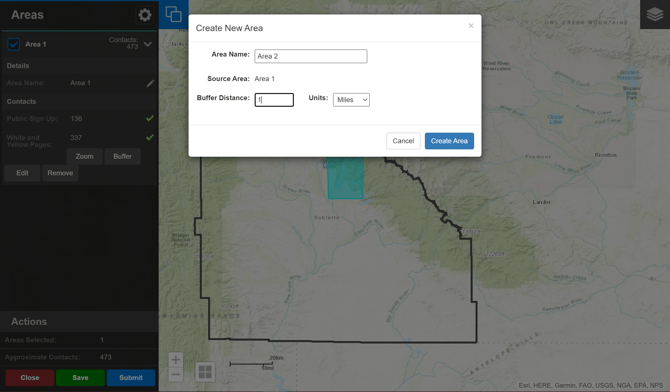
- Buffering allows you to exclude certain zones from your area.
- To create a buffer around your area, select Buffer from the areas panel.
- Enter the distance you want to buffer around your area in the Buffer Distance field.
- Click Create Area.
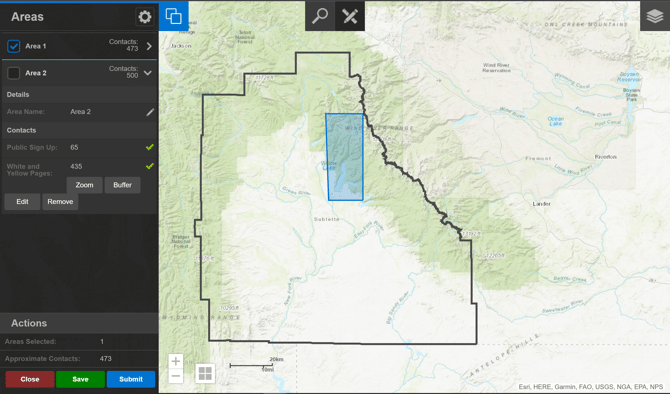
- A new area will appear in the Areas panel.
- Deselect the area you wish to buffer from your alert.
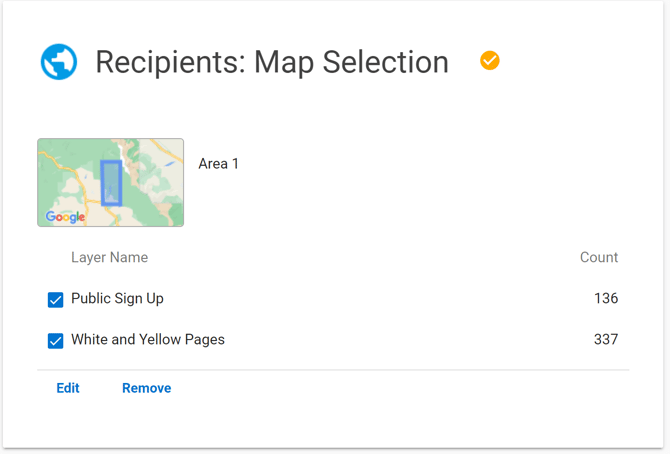
Send the Selected Recipients to the Alert Form
- Click Submit
 on the Areas panel and then Send to send selected recipients to the Alert form.
 - Deselect any recipient categories who shouldn't receive your message.
Complete Subject and Message
- Fill out your message's subject and body.
- You can use the rich text editor to format your message's text.
- You can use the rich text editor to format your message's text.
- If desired, you can add an image to your message's body.
- To add an image, click the Image icon to browse the system or your device for images to attach or to link to an image via a URL.
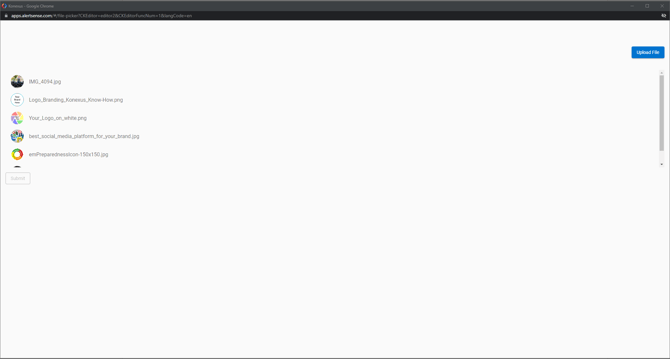
- To browse the system or your device for images, click Browse Server. You will have two options for selecting an image to attach to your message.
- Click Upload File to upload a file from your device
- Select an image to attach an image previously uploaded to Konexus to your message
- Click Submit
- Click OK
- To browse the system or your device for images, click Browse Server. You will have two options for selecting an image to attach to your message.
- To add an image, click the Image icon to browse the system or your device for images to attach or to link to an image via a URL.
- To include a link that Konexus provides to a webpage with additional details in your message, click the Add Link to Message checkbox under the Message Body box.
Warning: Only include a link to your message if the alert is designed for your public. Do NOT include a link if your message is intended to be internal only because the links will be visible to the public.

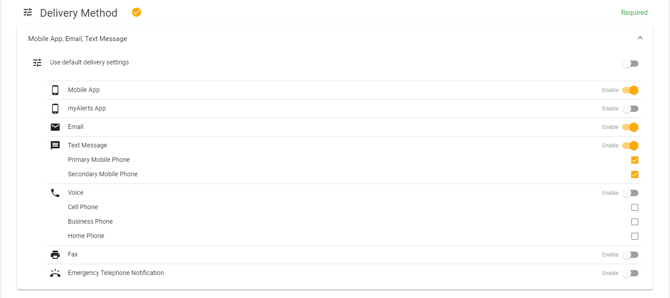
Select Delivery Method
- Toggle the switch next to a specific Delivery Method to "On" if you want to send your message via that channel. For example, if recipients should receive a message as an email, toggle the switch next to email to "On". When toggled to "On", the switch will appear yellow.
Confirm your Message
You can listen to what your message will sound like text-to-speech or listen to your pre-recorded audio. If your agency has voice opt-out enabled, you will hear the message with the greeting and opt out message. Click Play Message Preview.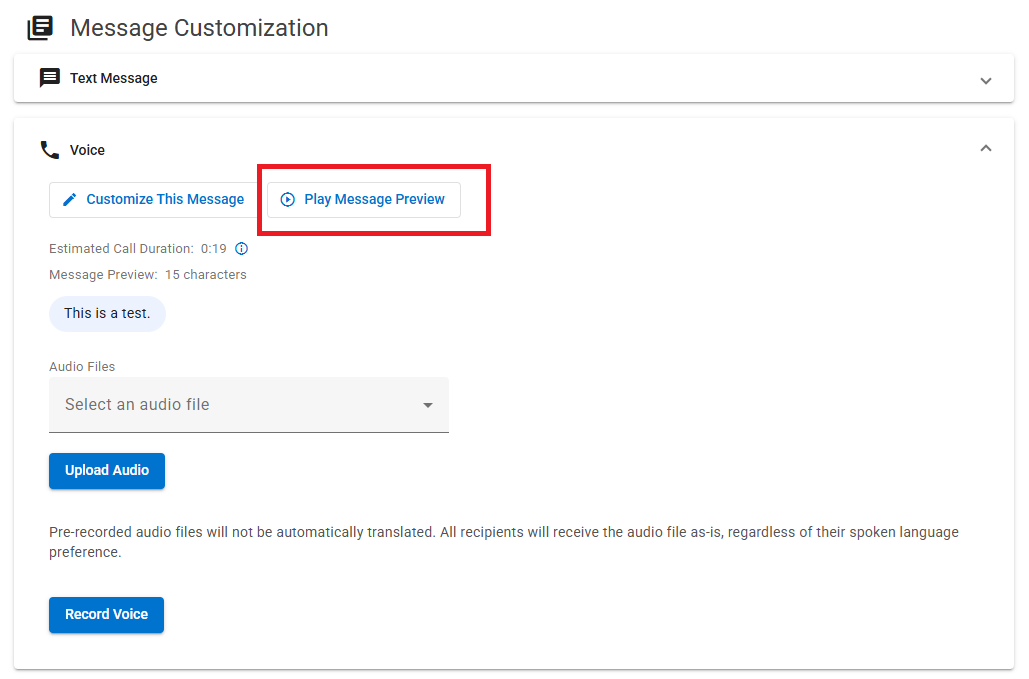
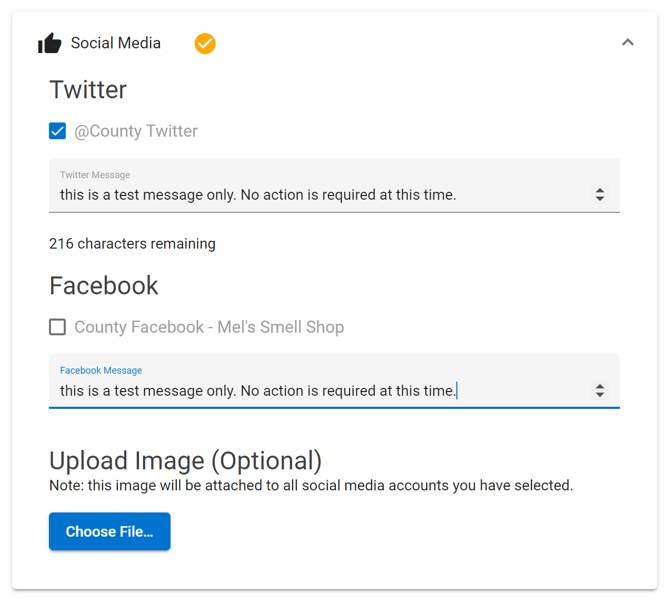
Select Social Media Channels
If you want your message to be posted to social media channels that have been connected to Konexus, you'll need to select these channels from the Alert Form.
- From the Alert Form, click the arrow next to Social Media to open the Social Media section.
- Select the box next to the corresponding social media channel to indicate the social media channel where your message will appear.
Please note, you will need to connect your social media channels to Konexus before you'll be able to post to these channels. Read this article to learn how to connect social media channels to Konexus.
Preview and Send
- Review the Preview card to ensure all the entered information is correct. If any required fields have not been completed, the preview card will notate which required fields are still incomplete.
- Click Send.
- Users will be prompted to confirm that they wish to send and can view the total recipient count before sending. Once users confirm that they wish to send, the message will be sent to the public. Once an alert is sent, it cannot be modified.
Canceling a Public ETN Alert
- Public ETN alerts can be canceled. If you need to cancel a Public ETN alert at any time, just click the Cancel button in the Alert History section.
- You can also call the 24/7 help line (1-888-307-2013) and the technical team will be happy to stop the Public ETN Alert for you.